x

For any questions, customizations or quotes, please call us at 1.800.519.5753 or e-mail: info@homesaunakits.com

Visit us in store at 271 Shoemaker St, Unit #2, Kitchener, ON, N2E 3B3. Showroom hours are 9am to 4pm.

Online ordering temporarily disabled - Please call us at 1.800.519.5753 or e-mail: info@homesaunakits.com

Pinterest

How Our Custom Sauna Builder Tool Helps You Build Your Own Sauna From the Start

To successfully build your own sauna, you must calculate the exact cubic footage of your room and match it to a heater with the correct kilowatt output before buying materials. Most DIY errors stem from purchasing a heater that is too weak for the room’s volume or ignoring insulation requirements. This guide explains how to use our custom builder tool to plan a sauna that fits your space and performs efficiently.

Why Building Your Own Sauna Requires More Than Just Choosing a Kit

Building a functional sauna requires precise coordination between room volume, insulation quality, and heater capacity to ensure the room reaches a safe and comfortable temperature.

Many homeowners assume a standard kit is a “one-size-fits-all” fix. This is almost never true. A generic kit often clashes with the specific limitations of your basement or backyard.

One major mistake is picking dimensions that don’t match standard lumber lengths. This leads to wasted material and extra cutting. Heater mismatch is even more critical.

If your heater is too weak for the volume, the room will remain cold. If it is too powerful, it will shut off constantly. This creates a harsh, uneven heat.

Ceiling height matters too. A ceiling that is too high traps heat where you can’t feel it. Bad bench layouts can also ruin the vibe. If benches are too narrow or close together, you can’t relax.

Our custom builder tool solves this. It forces you to address these variables upfront so everything works together.

How Our Custom Sauna Builder Tool Works Step by Step

Our custom sauna builder tool digitizes the planning process to calculate compatible components and material lists based on your specific inputs.

The tool removes the complicated math from your project. You don’t need to be an architect to get a professional result. We structured the logic to guarantee technical compatibility.

Here is the simple process:

  • Select Sauna Type: Choose between an indoor or outdoor setup.
  • Input Dimensions: Enter your exact width, depth, and height.
  • Select Wood Species: Pick your material, like a cedar sauna package.
  • Configure Bench Layout: Visualize the seating to maximize comfort.
  • Heater Selection: The tool picks a heater that matches your design’s volume.
  • Review: Verify every spec before you order.

This configuration happens before you spend a dime. You can see exactly what fits. This prevents the headache of ordering a kit that doesn’t fit your walls.

Selecting Your Layout and Wood Type

Choosing your layout and wood type early dictates the structural integrity and long-term durability of your sauna.

The first step is deciding between an indoor sauna kit and an outdoor sauna kit. Outdoor units need specific roofing and weatherproofing that indoor units do not. The tool adjusts for these needs instantly.

Material choice is just as important. We suggest Western Red Cedar. It naturally resists decay and stays cool to the touch. You can even select specific grades, like Clear Western Red Cedar, to get the look you want.

Layout planning changes how the room feels. A drawing might look big enough, but reality is different. By using the tool, you ensure the benches offer enough room to recline comfortably.

Matching the Heater to the Space

The builder tool automatically calculates the cubic footage of your design to recommend the precise heater output (kW) required for optimal performance.

Heater sizing is a mathematical calculation, not a guess. An undersized heater will run forever without getting hot enough.

The tool analyzes your dimensions. It then suggests heaters that handle that specific volume. This ensures you don’t waste electricity or suffer through a lukewarm sauna session.

We also factor in sauna heater placement. Heaters need specific safety gaps from wood surfaces. Knowing where the heater goes helps you plan your electrical wiring now. You won’t have to rip open walls later to move a wire.

How the Builder Tool Helps You Choose the Right Sauna Size

The builder tool visualizes critical measurements like ceiling height and bench width to ensure your layout accommodates the desired number of users comfortably.

Picking the right size is the hardest part for most DIYers. Standard sizes vary, and they might not fit your specific area.

Typical dimensions for a single person can be as tight as 4×4 feet. However, a sauna size for 2 people usually needs at least 4×6 feet. If you want a sauna size for 4 people, aim for 6×8 feet or larger.

The minimum size is often dictated by heater safety clearances and the door swing. Our tool prevents you from designing a space that is physically impossible to use.

Ceiling height is vital for efficiency. The target is usually 7 feet. This keeps the heat pocket low, right where you are sitting. If you try to design a 9-foot ceiling, the tool flags it as inefficient.

Width impacts bench comfort too. You need depth for both upper and lower benches. The tool helps you see if you have room for wide benches or if you are forcing a cramped layout.

Custom vs Pre-Built Sauna Kits: What’s the Difference?

Custom sauna kits allow you to specify exact dimensions and layouts, while pre-built kits restrict you to static sizes that often waste space.

Most competitors sell rigid boxes. They offer a fixed menu, like 5×7 or 6×6. If your space is 5.5 feet wide, you lose six inches of usable room.

These companies rarely help with the technical details either. You are left hoping the included heater works for your climate.

Our approach is different. We solve the modular sauna vs custom debate by giving you the best of both worlds. You get the ease of a kit with the fit of a custom build.

We align the vapor barrier, insulation, and heater size to your project. You aren’t buying a product off a shelf. You are designing a system. The builder tool bridges the gap between raw lumber and a prefabricated unit.

How the Builder Tool Helps You Avoid Costly Installation Mistakes

Using the builder tool prevents expensive on-site errors by accounting for framing clearances, door swings, and ventilation paths before construction begins.

Fixing a mistake on paper is free. Fixing it during construction costs money.

Proper clearance is essential for safety. You cannot place wooden benches directly against a heater. The tool guides you toward safe, code-compliant layouts.

Vent placement is another technical detail. You need proper airflow to keep the air fresh and the heater running. The tool helps you understand where intake and exhaust vents should go.

Door swing direction matters for traffic flow. You need to choose between a glass vs wood door and decide which way it opens. A door that hits a wall is a nuisance.

For those building in a cold Canadian climate, insulation is key. The tool ensures your design accounts for necessary thermal barriers. This prevents cold spots. By planning installation space clearance upfront, you avoid the nightmare of walls that don’t fit the room.

Who Should Use the Custom Sauna Builder Tool

The custom sauna builder tool is designed for homeowners, contractors, and DIY enthusiasts who need a verified material list for a precise installation.

This tool isn’t just for experts. It is for anyone who wants their project to succeed.

Homeowners planning basement conversions find it essential. Basements often have odd obstacles like support posts or ductwork. The tool helps you navigate these constraints.

People planning backyard wellness projects use it to visualize the footprint. It helps determine if a 6×8 unit fits on the existing patio slab.

Contractors use it to design client installs fast. It generates a reliable quote and material list, saving hours of manual math.

If you are unsure about electrical requirements or dimensions, this tool is for you. It acts as a technical consultant. It gives you the confidence to move forward.

Frequently Asked Questions About Building Your Own Sauna

Here are answers to the most common questions regarding sizing, layout, and heaters for DIY sauna projects.

What is the standard sauna size for a home? There is no single standard, but a 5×7 foot layout is very common. This size fits 3-4 people comfortably while remaining energy efficient.

How much space do I need to build my own sauna? You need the internal dimensions plus the framing width. Generally, allow for at least 4×4 feet of internal space for a functional, small sauna. Always account for exterior maneuvering room.

Can I customize bench layouts? Yes. You can choose L-shaped, straight, or opposing benches depending on your room width. The layout must allow for safe access to the heater.

Does the builder tool recommend the right heater? Yes. The tool calculates the total cubic volume of the room and selects a heater with the appropriate kW output to heat that specific volume.

Start Your Build With Home Sauna Kits

Home Sauna Kits provides the factory-direct materials and technical guidance you need to turn your custom design into reality.

Building a sauna should be an exciting project, not a stressful one. We aim to bridge the gap between professional construction and DIY accessibility.

By using our builder tool, you eliminate the risk of mismatched parts. You get a material package cut to your specifications, ensuring a smooth assembly.

Stop guessing at dimensions. Don’t rely on generic kits that might not fit your life. Take control of your project today. Use our custom builder tool to design a sauna built for your home, your climate, and your needs.
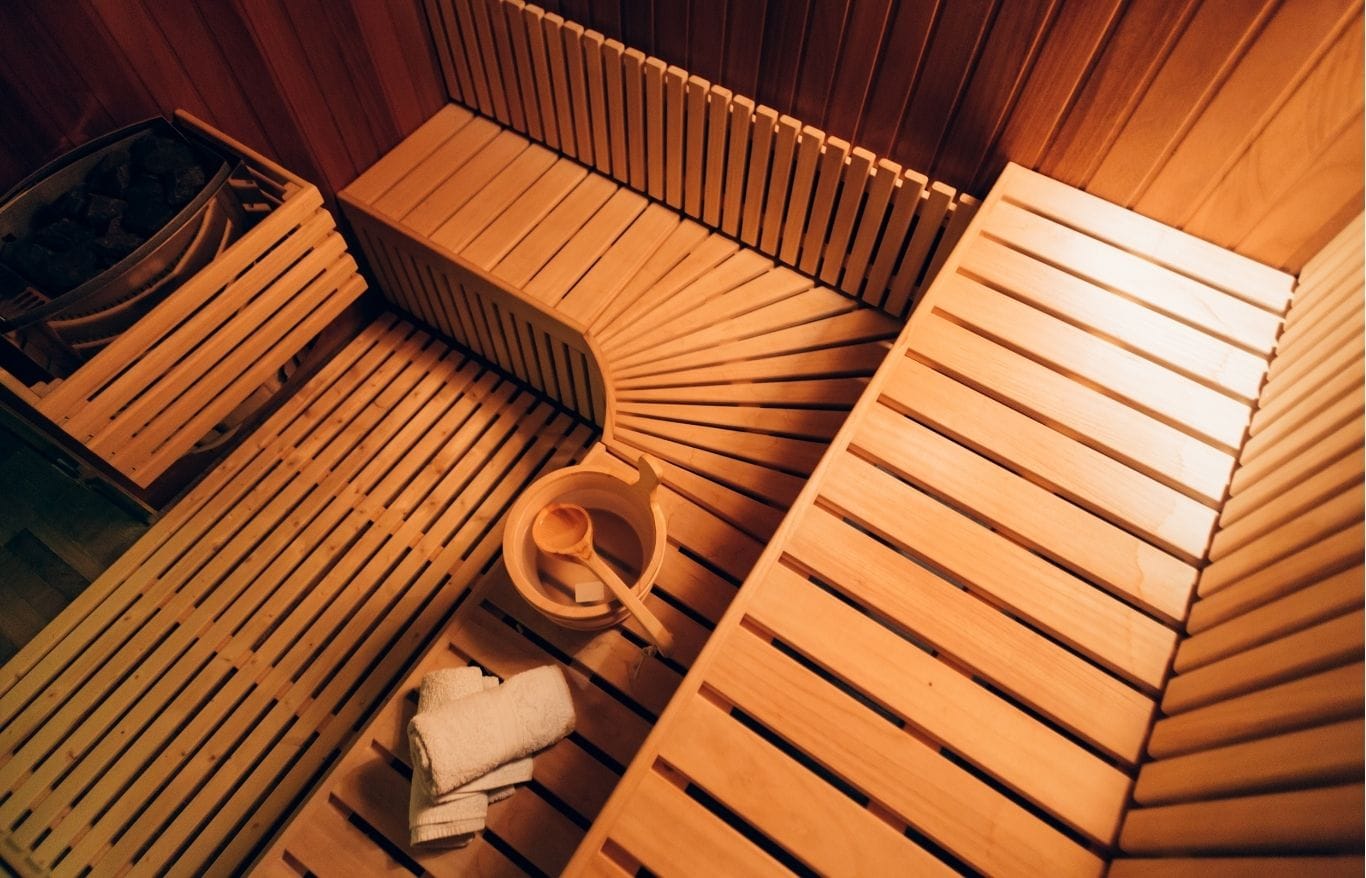
How to Design a Personalized Sauna That Fits Your Home and Wellness Goals

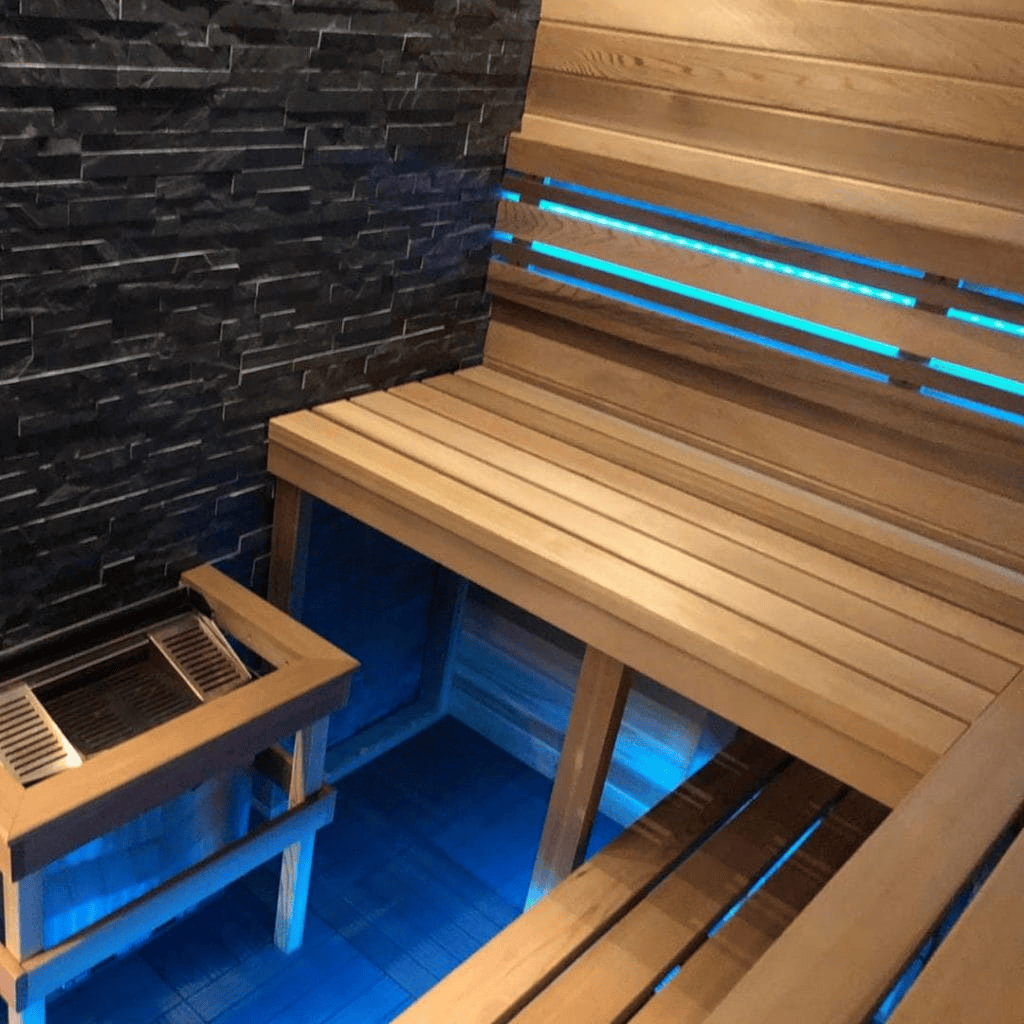
A personalized sauna is a custom-built wellness space designed to fit your exact available dimensions while utilizing specific heater technology and wood types for your health needs. Unlike pre-fabricated box units, a custom design lets you control the entire environment. This ensures the build fits into your life seamlessly instead of becoming a bulky obstacle in your home. This guide explains how to choose the right materials, plan your layout, and pick the best heater for your project.

What Factors Define a Truly Personalized Sauna?

A personalized sauna is defined by its custom dimensions, specific heater technology, and material choices that align with user preference.

Generic kits usually come in fixed square shapes. These rigid designs often leave awkward gaps or dominate a room. A custom build adapts to the room, rather than forcing the room to work around the sauna.

You gain total control over design elements like:

  • Bench Heights: Adjust levels to match your physical comfort.
  • Door Placement: Optimize the traffic flow in the room.
  • Floor Plans: Utilize every inch of available space.

This attention to detail creates a spa-quality experience in your own house.

Traditional vs. Infrared: Which Heater Suits Your Wellness Goals?

Traditional saunas rely on high heat and steam for deep sweating, whereas infrared saunas use light to heat your body directly at lower temperatures.

The right choice depends entirely on the experience you want. If you enjoy intense heat and the ritual of pouring water on rocks (“löyly”), go with a traditional heater. If you prefer a milder heat that targets muscles without thick, humid air, infrared is the better path.

Benefits of Traditional Steam Saunas

Traditional steam saunas improve circulation and respiratory health by generating high heat and humidity levels that often exceed 180°F.

The sudden rush of steam opens your pores instantly. This style of bathing has supported cardiovascular health for centuries.

You need high-quality components to get this experience right. We always recommend Harvia heaters for their proven reliability. They provide consistent heat and handle the stress of daily thermal cycling without failing.

When to Choose Infrared Technology

Infrared technology is ideal for people who prefer lower temperatures or need relief from specific joint pain that responds well to radiant heat.

These units usually run between 120°F and 140°F. This lower range makes the session much more comfortable if you are sensitive to extreme heat.

Key advantages of infrared setups include:

  • Longer sessions without feeling overheated.
  • Direct heat penetration for muscle recovery.
  • Lower humidity for easier breathing.

What Is the Best Wood for a Custom Sauna Build?

Western Red Cedar is the best wood for custom saunas because of its natural decay resistance, pleasant aroma, and superior thermal properties.

You need wood that won’t warp under heat and moisture stress. Other timber options often degrade quickly in these extreme conditions. Cedar also stays cool to the touch, so it remains comfortable to sit on even when the room is scorching hot.

Why Western Red Cedar Is the Top Choice

Western Red Cedar is the top choice because its cellular structure acts as natural insulation to keep heat inside the sauna.

It offers a rich, beautiful look ranging from amber to deep brown. From a practical standpoint, it is the most durable option for wet environments.

Reasons to choose Cedar include:

  • Natural oils that repel insects and fungi.
  • An iconic scent that helps you relax.
  • Resistance to warping in high humidity.

Alternative Wood Options for Modern Aesthetics

Clear Hemlock is a valid alternative for builders seeking a lighter, more uniform color palette, although it lacks the rot resistance of cedar.

It provides a very modern, clean aesthetic often seen in commercial spas.

However, this wood requires more maintenance. It does not handle moisture as well as cedar. You must ensure your ventilation is flawless to prevent staining or warping if you go this route.

How Do You Plan the Layout for a Small or Awkward Space?

Planning a layout for small spaces involves utilizing corners and custom bench configurations to maximize internal volume.

You don’t need a huge room to have a great sauna. Angled benches can turn a tight corner into a comfortable seat.

Consider these layout strategies:

  • Install a glass door or front panel to reduce the “closed-in” feeling.
  • Use multi-level benches to increase seating capacity.
  • Place the heater on a side wall to open up floor space.

Building a Personalized Sauna in Canada: What You Need to Know

Building a sauna in Canada demands higher-grade insulation and vapor barriers to withstand extreme temperature shifts and prevent moisture damage.

The Canadian climate is unforgiving. A standard build that works in California will fail here. You must account for deep freezes so your heater doesn’t run constantly just to maintain temperature.

Insulation Requirements for Cold Climates

For cold climates, you need insulation with a minimum value of R-12 or higher in the walls and ceiling to retain heat efficiently.

Fiberglass or mineral wool batts are the standard choices here. You must pair this insulation with a foil vapor barrier.

The foil barrier performs two critical tasks:

  • Reflects heat back into the sauna interior.
  • Prevents moisture from seeping into walls and freezing.

Indoor vs. Outdoor Considerations

Indoor builds are generally easier to maintain in Canada, while outdoor builds must be engineered to handle heavy snow loads and sub-zero temperatures.

An indoor sauna benefits from your home’s existing HVAC and insulation envelope. It is always ready to use.

Outdoor units require extra planning:

  • Sloped roofs are necessary to shed snow.
  • Insulated floors are required to stop cold drafts.
  • Exterior finishes must be weather-treated every year.

What Are the Essential Ventilation and Electrical Requirements?

Essential requirements include a dedicated 220V electrical circuit for the heater and properly placed intake and exhaust vents for air circulation.

Most robust heaters cannot run on a standard wall outlet. You need a licensed electrician to install the heavy-duty wire required for safety.

Ventilation ensures the equipment runs correctly:

  • Intake Vent: Place this low on the wall near the heater.
  • Exhaust Vent: Place this high on the opposite wall.
  • Airflow: Prevents the high-limit switch from tripping unnecessarily.

Why Choose Home Sauna Kits & Custom Saunas for Your Project?

We provide the premium lumber, authentic heaters, and expert guidance necessary to build a professional-grade sauna yourself.

At Home Sauna Kits, we bridge the gap between hiring expensive contractors and buying flimsy pre-fab boxes. Our kits give you the exact material quantities you need. You get the satisfaction of building it yourself without the guesswork.

We source only the finest Western Red Cedar and reliable Harvia components. We ensure your project is built to last. Start your build with Home Sauna Kits & Custom Saunas today.

How Do Sauna Kits in Ontario Adapt to Local Climate and Building Codes?

Installing a sauna in Ontario isn’t like setting one up in a place where the weather is warm and dry all year long. The combination of cold winters, humid summers, snow loads, and strict building codes in Ontario is somewhat unique, and therefore, sauna kits require the proper design to be able to withstand these conditions.

That’s why not all sauna kits are created equal.

For homeowners considering sauna kits in Ontario, understanding how these kits adapt to local climate conditions and comply with building codes is essential. A sauna that performs well in theory but fails under real Ontario conditions quickly becomes a headache rather than a wellness upgrade.

Let’s take a closer look at how well-designed sauna kits adapt to Ontario’s environment and regulatory landscape, and why those adaptations matter.

Ontario’s Climate Demands More From Sauna Kits

Ontario has quite dramatic seasonal changes. The winters here are characterized by very low temperatures, snow and ice, while summers tend to be hot and humid. Any sauna kits installed in this area have to be capable of operating efficiently and consistently in the whole range of these conditions.

Key climate challenges include:

  • Sub-zero winter temperatures
  • High humidity during warmer months
  • Freeze-thaw cycles that stress materials
  • Snow load on outdoor structures

Sauna kits that are not designed with these realities in mind often suffer from heat loss, moisture issues, or structural wear over time.

At Home Sauna Kits, sauna systems are built to handle these exact conditions, ensuring year-round usability rather than seasonal compromise.

Insulation That Works in Cold Canadian Winters

One of the most critical adaptations for sauna kits Ontario homeowners use is proper insulation. In colder climates, insulation isn’t optional—it’s essential.

High-quality sauna kits use:

  • Thick wall panels to retain heat
  • Tight-fitting construction to minimize air leaks
  • Materials that maintain performance in cold temperatures

When saunas are not insulated properly, they take longer to warm up, have difficulty staying at the right temperature, and the heaters get extra wear and tear .For example, during the Ontario winters, using the sauna can be a very inefficient way to heat your body or it could simply be uncomfortable.

One of the advantages of well insulated sauna kits is that they provide consistent performance even in freezing temperatures.

Moisture Management for Humid Conditions

Ontario’s humidity presents another challenge. Saunas generate moisture by design, and when combined with external humidity, poor construction can lead to condensation issues.

Sauna kits adapted for Ontario account for moisture by:

  • Using breathable wood materials
  • Allowing controlled airflow
  • Preventing trapped moisture within walls

This balance helps reduce the risk of mold, warping, and long-term material degradation. Proper moisture management ensures the sauna remains healthy, safe, and durable over time.

Material Selection That Handles Temperature Swings

Not all wood performs well in Ontario’s climate. Temperature swings cause expansion and contraction, which can lead to cracking or warping if the wrong materials are used.

Sauna kits designed for Ontario typically use:

  • Low-resin, dimensionally stable wood
  • Materials that tolerate repeated freeze-thaw cycles
  • Woods that resist moisture absorption

These material choices help sauna kits maintain their structural integrity and appearance even after years of seasonal changes.

Heater Compatibility and Electrical Standards

Another major factor when installing sauna kits in Ontario is electrical compatibility. Heaters must meet local electrical standards and operate safely within Canadian regulations.

Properly designed sauna kits account for:

  • CSA or equivalent safety standards
  • Voltage requirements common in Ontario homes
  • Safe heater clearances and ventilation

Using a heater that isn’t suited to local electrical codes can cause delays during inspection or require costly modifications. Sauna kits that align with Ontario standards simplify installation and approval.

Home Sauna Kits focuses on compatibility and safety, helping homeowners avoid common compliance issues.

Adapting Sauna Kits to Ontario Building Codes

Ontario building codes are designed to ensure safety, durability, and proper construction. Sauna kits must align with these requirements to avoid inspection issues or future liability.

Key code-related considerations include:

  • Structural stability
  • Fire safety clearances
  • Electrical compliance
  • Proper ventilation

While building codes vary slightly by municipality, sauna kits designed for Ontario take these requirements into account from the start. This reduces the risk of installation delays or costly adjustments later.

Indoor vs Outdoor Sauna Kit Considerations

Ontario homeowners often choose between indoor and outdoor sauna kits, and each option has its own code and climate considerations.

Indoor Sauna Kits

Indoor sauna kits must integrate with the home’s existing structure and systems. This includes:

  • Electrical access
  • Ventilation planning
  • Moisture control

Well-designed indoor sauna kits are compact, efficient, and easy to integrate into basements, bathrooms, or spare rooms without major renovations.

Outdoor Sauna Kits

Outdoor sauna kits in Ontario face harsher conditions. Snow load, wind exposure, and ground stability all come into play.

Outdoor sauna kits adapted for Ontario typically include:

  • Reinforced roofing
  • Weather-resistant exterior materials
  • Stable framing systems
  • Proper elevation to avoid water damage

These features ensure outdoor saunas remain safe and functional year-round.

Ventilation Designed for Comfort and Compliance

Ventilation plays a dual role in sauna performance. It affects comfort and compliance.

Proper ventilation:

  • Supports even heat distribution
  • Improves air quality inside the sauna
  • Helps manage moisture
  • Aligns with safety expectations

Sauna kits designed for Ontario include ventilation planning as part of the overall system, rather than treating it as an afterthought.

Assembly Designed for Local Conditions

Another adaptation often overlooked is ease of assembly. Ontario weather doesn’t always cooperate, especially for outdoor installations.

Sauna kits built for Ontario:

  • Use precision-cut components
  • Include clear instructions
  • Reduce on-site construction time

This makes installation more manageable, even in colder conditions, and helps ensure the sauna is assembled correctly the first time.

Longevity Through Seasonal Use

A common misconception is that saunas in Ontario are only practical for winter use. In reality, properly designed sauna kits are meant for year-round enjoyment.

Sauna kits adapted for Ontario:

  • Maintain performance in winter
  • Handle summer humidity
  • Require minimal seasonal adjustments

This durability ensures the sauna remains a long-term investment rather than a seasonal feature.

Why Local Adaptation Matters

Choosing sauna kits designed for other climates often leads to problems once they’re installed in Ontario. Poor insulation, incorrect materials, or non-compliant components can shorten lifespan and complicate ownership.

When sauna kits are designed with Ontario’s climate and regulations in mind, homeowners benefit from:

  • Faster installation
  • Fewer compliance issues
  • Better long-term performance
  • Greater peace of mind

At Home Sauna Kits, this local-first approach ensures that sauna kits are practical, reliable, and suited to real Ontario conditions.

Planning Ahead Makes a Difference

Homeowners planning to install a sauna often focus on design first. While design matters, function and compliance matter more in the long run.

Asking the right questions early helps:

  • Avoid permit delays
  • Reduce installation costs
  • Ensure consistent performance

Understanding how sauna kits adapt to Ontario’s climate and codes allows homeowners to make informed decisions with confidence.

How Home Sauna Kits Help You Adapt Your Sauna To Ontario’s Climate

So how do sauna kits in Ontario adapt to local climate and building codes? Through thoughtful insulation, climate-appropriate materials, code-aware design, and practical installation planning.

Ontario’s weather and regulations demand more from sauna kits than milder regions do. When those demands are addressed from the start, sauna ownership becomes simple, safe, and rewarding.

At Home Sauna Kits, sauna systems are designed specifically for Ontario homeowners. This means that every kit will work well through different seasons and comply with local regulations. The outcome is a sauna, which makes you feel right at home instead of a sacrifice.

If you want to have a sauna that is really suitable for Othe ntario lifestyle and you are willing to invest in one, the first step towards an enjoyable, durable experience is to get to know these adaptations.

What Are the Most Common Sauna Replacement Parts You’ll Need and When

Owning a sauna means that you have made a long-term investment in comfort, wellness, and routine. Similar to any other system that runs on heat, electricity, and uses natural materials, a sauna is not something that you can just install once and leave forever. With time, certain parts will inevitably get worn and need to be changed.

It is perfectly fine.

Knowing sauna replacement parts, their function, and when they usually need to be serviced, you can make your sauna remain safe and efficient for several years. The secret is not to refrain from replacements. It is, however, important to understand what to anticipate and to arrange accordingly so that minor problems do not become a major inconvenience.

We shall discuss the most common sauna replacement parts, the reasons for their wear and tear, and how to detect the right time for their replacement.

Why Sauna Parts Eventually Need Replacing

Saunas operate under extreme conditions. High heat, repeated temperature changes, moisture, and regular use all place stress on components over time.

Common factors that lead to replacement include:

  • Heat exposure over long periods
  • Mineral buildup from water on stones
  • Electrical wear from repeated heating cycles
  • Natural aging of wood and mechanical parts

Any sauna, even those of high standard, will at some point require maintenance as well as replacement parts. Realizing this beforehand leads to you protecting your investment and not being surprised by the downtime.

When it comes to relying on Home Sauna Kits for the parts, these parts can be considered an upgrade to your current system due to their high, tech features which make them easy to maintain and more predictable.

Sauna Heating Elements

When Heating Elements Need Replacing

Heating elements are one of the most common sauna replacement parts. They work hard every session, heating up and cooling down repeatedly.

Signs a heating element may need replacement include:

  • The sauna takes much longer to heat up
  • The temperature never reaches the set level
  • Certain areas of the heater don’t get hot
  • The heater trips breakers unexpectedly

On average, heating elements can last several years, depending on the frequency of use and maintenance. Regular cleaning and proper stone placement can extend their lifespan.

Sauna Stones

Why Sauna Stones Wear Out

Sauna stones absorb and radiate heat, creating the smooth, even warmth that defines the sauna experience. Over time, they crack, crumble, or become compacted.

Common signs it’s time to replace sauna stones:

  • Stones are visibly cracked or breaking apart
  • Poor airflow through the heater
  • Uneven or harsh heat
  • Reduced steam when water is applied

Replacing sauna stones every one to two years is common for regularly used saunas. Fresh stones protect heating elements and improve overall performance.

Sauna Control Panels

When Controls Start to Fail

Control panels regulate the temperature, timing, and general functioning of a sauna. As they deal with electrical signals and frequent changes, they may wear out after some time.

Less obvious Signs a control panel may require replacement include:

  • Buttons stop responding
  • Temperature readings are inaccurate
  • The sauna turns off unexpectedly
  • Error codes appear frequently

Replacing a faulty control panel restores reliability and safety, ensuring your sauna behaves exactly as intended.

Temperature Sensors and Thermostats

Small Parts, Big Impact

Temperature sensors and thermostats play a critical role in maintaining consistent heat. When they fail, sauna performance suffers.

You may need to replace sensors if:

  • The sauna overheats or underheats
  • Temperature fluctuates unexpectedly
  • Readings don’t match how the sauna feels

These are relatively small sauna replacement parts, but they have a major impact on comfort and safety.

Sauna Lights and Light Covers

Heat-Resistant Components Wear Over Time

Sauna lighting is made to withstand heat; however, even heat-rated fixtures don’t last indefinitely.

Signs that lighting parts are due for replacement:

  • Lights flicker or quit working
  • Covers turn brittle or crack
  • Moisture accumulates inside the fixtures

Changing the lights and covers brings back the sauna’s atmosphere as well as guarantees electrical safety inside.

Sauna Door Hardware

Hinges, Handles, and Latches

Doors are used every session, making their hardware some of the most frequently stressed parts of a sauna.

Common replacement needs include:

  • Loose or squeaking hinges
  • Handles that become hot to the touch
  • Latches that no longer seal properly

Worn door hardware affects heat retention and safety. Replacing these parts helps maintain proper sealing and ease of use.

Sauna Door Seals and Gaskets

Keeping Heat Where It Belongs

Door seals and gaskets are basically the things that keep heat inside. However, due to constant exposure to heat, they can become hard or even develop cracks.

You may have to change seals when:

  • The heat is escaping around the door
  • The door doesn’t close as tightly as before
  • The seal is hard, dry, and crumbly

Fresh seals are not only good for saving energy but also for giving your heater a rest.

Vent Covers and Airflow Components

Often Overlooked, Always Important

Ventilation parts help regulate airflow and comfort. While they don’t fail as often as heaters or controls, they can degrade or become blocked.

Replacement may be needed if:

  • Vent covers crack or warp
  • Airflow feels restricted
  • Moisture accumulates inside the sauna

Proper ventilation supports both comfort and longevity of other sauna components.

Sauna Benches and Wood Components

Natural Materials Age Gracefully, But Not Forever

Sauna benches and interior wood surfaces experience constant heat and moisture. Over time, wood can dry out, discolor, or develop cracks.

You may consider replacing wood components if:

  • Benches feel rough or splintered
  • Structural support weakens
  • Stains or odors persist despite cleaning

Replacing worn wood parts refreshes both comfort and appearance while maintaining hygiene.

Electrical Wiring and Connections

Safety Comes First

Electrical components are less frequently replaced, but when they fail, they must be addressed immediately.

Signs of electrical issues include:

  • Burning smells
  • Tripped breakers
  • Flickering lights or controls

Any electrical replacement should be handled carefully, following safety standards. Using compatible sauna replacement parts is critical to maintaining safe operation.

How Often Should Sauna Replacement Parts Be Expected?

There’s no single timeline that applies to every sauna, but general patterns do exist.

Typical replacement intervals:

  • Sauna stones: every 1–2 years
  • Heating elements: several years, depending on use
  • Controls and sensors: as needed
  • Lights and seals: as wear becomes visible

Regular inspections help catch issues early, often allowing you to replace parts before they cause larger problems.

Why Using the Right Replacement Parts Matters

However, not all replacement parts can be interchanged. Incompatible parts, if used, not only can performance be hampered, but there may be safety risks, your warranty might get voided, and the damage can even be extended.

Home Sauna Kits only choose sauna replacement parts that perfectly fit specific systems, so that there is no worry about compatibility, and the customers get peace of mind.

Preventive Maintenance Reduces Replacement Frequency

While replacement is inevitable, proper care can significantly extend the life of sauna components.

Good habits include:

  • Rearranging sauna stones periodically
  • Keeping vents clear
  • Cleaning surfaces regularly
  • Avoiding excessive water use on heaters

These small steps reduce stress on components and delay the need for replacement.

Planning Ahead Makes Ownership Easier

The most stress-free sauna owners aren’t those who never replace parts. They’re the ones who expect it and plan for it.

Keeping track of:

  • Installation dates
  • Past replacements
  • Performance changes

makes maintenance predictable rather than reactive.

How You Can Get Sauna Replacement Parts With Home Sauna Kits

Saunas are built to last; however, like any system, they will require maintenance now and then. If you are familiar with the usual sauna replacement parts and the average time for their maintenance, then you can always have a safe, efficient, and great sauna at your disposal.

Heaters, stones, controls, sensors, lighting, and door parts are some of the single components that, not only by themselves but also collectively, contribute to the overall experience. If you maintain and replace them on time, your sauna will continue to perform at its best.

At Home Sauna Kits, replacement parts form an integral part of a long-term sauna ownership plan. Sauna owners who plan and invest in quality parts can look forward to years of hassle-free standard performance.

Knowing what to replace and when doesn’t just protect your sauna. It protects the experience that made you invest in one in the first place.

How Does a Cedar Sauna Bench Enhance Your Sauna Experience?

When people are thinking about renovating or installing a sauna, most of the time they think about the heaters, then some think about the layout, and finally about lighting. The benches come somewhere in between, if not last. They are usually taken for granted, like something that is seriously needed but will not make up the whole definition of the sauna. But if you have spent serious time in a sauna, this is far from being true.

A bench is the place one sits, reclines, relaxes, and stays during the session. The comfort, heat, and overall feeling in the sauna can be pretty dependent on the material the benches are made from, and this is the reason a cedar sauna bench has a far greater role in the actual experience of being in the sauna than most people ever realize. We’re going to discuss how cedar benches add more comfort, durability, and atmosphere to your sauna, and why they’re loved by many sauna owners.

We will talk about how cedar benches increase the comfort, durability, and atmosphere of a sauna, and why they are such a favourite among sauna owners.

Why the Bench Matters More Than You Think

A sauna bench is not just a piece of furniture. It is a functional surface that is exposed to heat, moisture, and frequent use. The sauna experience will be less enjoyable if the bench material is not suitable.

A good bench can be expected to:

  • Remain comfortable even at high temperatures
  • Be resistant to moisture and wear
  • Feels nice against bare skin
  • Allow for long, comfortable sessions

Cedar has become a popular wood for sauna benches because it can live up to all these requirements and more.

Cedar Stays Comfortable Even at High Heat

The first and most visible benefit of having a cedar sauna bench is the comfort that comes from its temperature. The reason cedar is considered a softwood is that its property of low heat conductivity is quite prominent. What this means is that when other materials are hot, cedar doesn’t reach that temperature and doesn’t remain hot either.

In the general application of this principle, it means:

  • Benches don’t get too hot for sitting comfortably, even during long sauna sessions
  • You hardly ever get hot spots or feel uncomfortable
  • The surface feels warm, not burning hot

This is particularly the case with high-temperat